The best storage and lighting layouts for a tight Kitchener kitchen put light exactly where you work and storage exactly where you waste space: under cabinets, beside the fridge, and down at the toe-kick. Do those three things well and even a galley kitchen in a 1950s Kitchener bungalow or a compact condo near the LRT line feels bigger, brighter, and far easier to cook in.
Picture a counter with no shadows, a pantry tower that slides out like a drawer, and a soft glow along the floor at night. That’s the goal. Small footprints don’t need more cabinets. They need smarter ones, lit from the inside and below, so every inch earns its keep.
In this guide, you’ll find eight image-ready layouts, from under-cabinet LED strips to glass-front cabinets and mirrored backsplashes that stretch the light. A tall, angled floor-length mirror can do the same trick at the end of a narrow room. Each idea is chosen for low-profile fit, easy installation, and how well it works with older Waterloo Region layouts, where walls are often fixed and ceilings sit low. Planning a bigger change? Bring these ideas to a kitchen remodelling contractor in Waterloo Region and turn them into a plan.
How We Chose These Small-Kitchen Ideas for Kitchener Homes
This is a curated roundup, not a hands-on product test. Every idea below earned its place by passing the same short checklist:
- Fits tight footprints, meaning kitchens under roughly 100 sq ft.
- Adds storage and light together, so each upgrade does two jobs.
- Works with older Kitchener homes, including uneven walls, dated wiring, and low ceilings.
- Stays budget-flexible, with cheaper and pricier routes noted.
- Flags renter- or DIY-friendly options wherever they exist.
Kitchener’s older housing stock shaped the list. Postwar bungalows and brick Victorians rarely have perfectly plumb walls, and long grey winters mean you can’t count on daylight to do the heavy lifting. So every idea had to earn its keep with artificial light, too.
A few terms will pop up along the way. Task lighting is focused light where you chop, stir, and read recipes. Ambient lighting is the general glow that fills the whole room. A toe-kick is the recessed strip at the base of your cabinets, right where your toes land.
Anything involving wiring is best treated as a trade job. Before you start, confirm the work and any permits with a licensed electrician and with the City of Kitchener or the Electrical Safety Authority.
1. Under-Cabinet LED Strips for Shadow-Free Counters
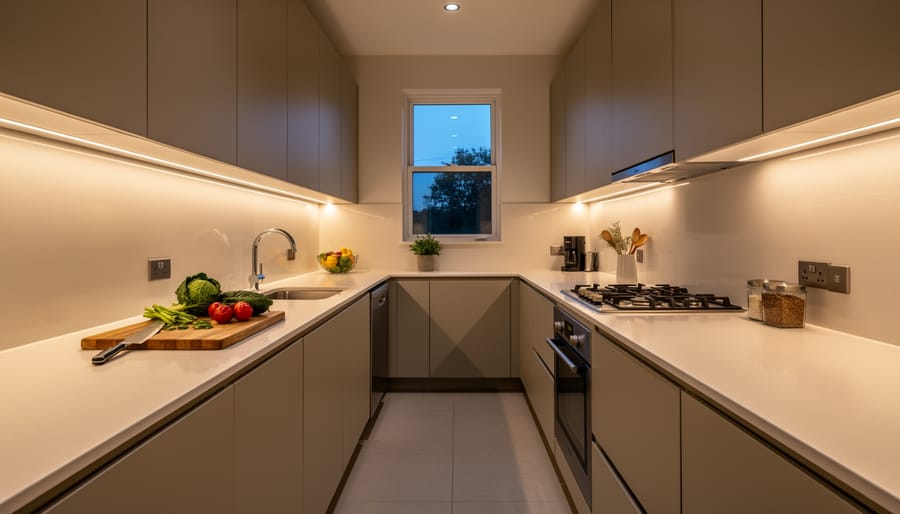
Wall cabinets cast a shadow right where you chop, slice and read recipes. Slim LED strips or bars tucked under the cabinet edge erase that shadow, and a narrow counter suddenly feels wider because every inch of it is lit evenly. In a Kitchener galley kitchen with one small window, this is often the single biggest upgrade for the least money.
Start with colour temperature. Aim for a warm white, around 2700K to 3000K. It flatters wood, warm paint and most food, and it keeps a compact room feeling cozy during those long, grey winter evenings. Cooler bulbs can make a small space feel clinical.
Renters and owners have different routes. Plug-in or battery strips stick on with adhesive, travel with you when you move, and need no electrician. Owners can go hardwired, with the wiring tucked inside the cabinet, for a cleaner look and a wall switch. Choose dimmable strips either way, so you can run them bright for meal prep and low for a late-night glass of water. Any hardwiring should be done by a licensed electrician.
Glare is the usual pitfall. Pick strips with a frosted diffuser or mount them behind the cabinet’s front lip, so the light hits the counter and not your eyes. That matters most over glossy tile, where bare LED dots reflect as bright specks.
Image callout: close-up of a lit galley counter at dusk.
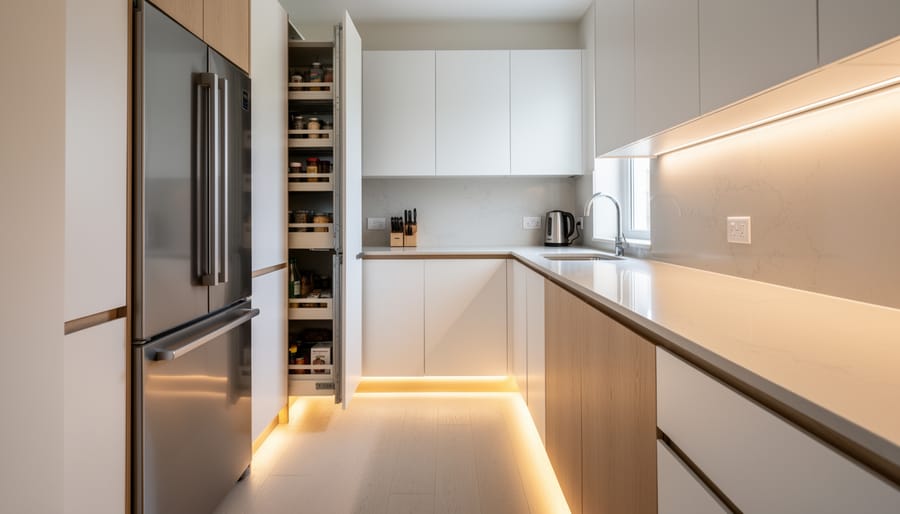
2. Slim Pull-Out Pantry Towers Beside the Fridge
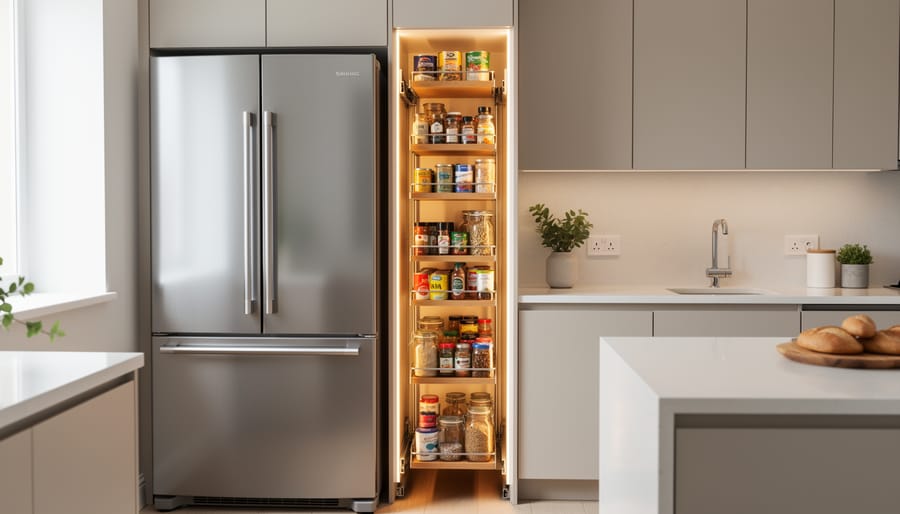
That awkward gap beside the fridge, usually somewhere between 6 and 9 inches wide, is some of the most wasted space in a compact kitchen. A slim pull-out pantry tower slides into that sliver and turns it into full-height storage. Think of it as a tall, narrow cabinet on rails, with shelves or wire baskets that glide out so you can reach everything from the front.
In older Kitchener homes, these gaps often show up where a replacement fridge came out narrower than the original, or at the end of a galley run where the cabinets simply stop. A tower fits both spots. Hold canned goods on the lower shelves, put oils and spice jars at eye level, and use the top tier for lightweight boxes. Because the unit pulls out fully, nothing disappears into a dark back corner.
Light solves the other half of the problem. A narrow cabinet is dim even with the door open, so tuck a slim LED strip into the cabinet frame. A motion-activated one is ideal. It switches on the moment you pull the tower out and shuts off when you slide it back, so you never fuss with a switch. Battery-powered versions suit renters, while a hardwired strip is a tidy option if you’re already doing electrical work.
Image callout: open pull-out pantry with visible lighting, showing the glow on the shelves and the items at the back.
3. Toe-Kick Drawers with Soft Floor-Level Glow
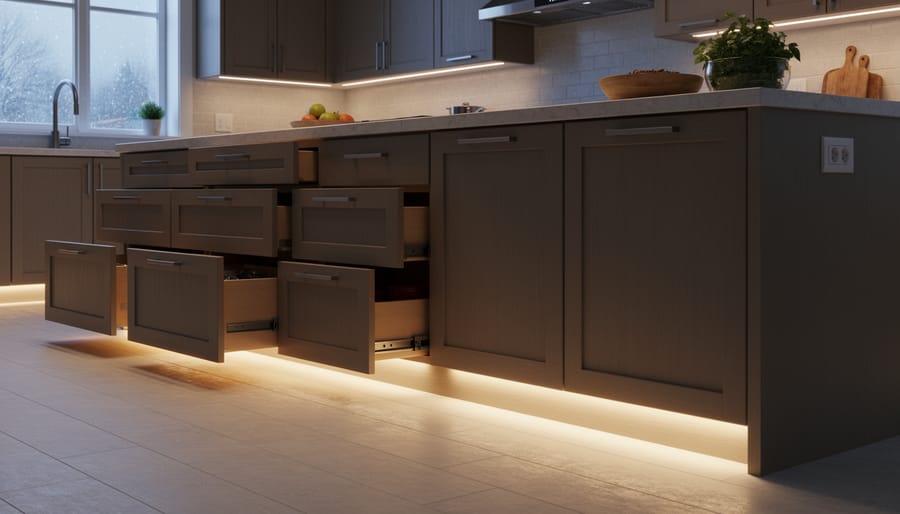
Look down at the strip of recessed space beneath your base cabinets. That’s the toe-kick, the shallow notch that lets your feet tuck in while you work at the counter. In most kitchens it’s wasted, but in a tight Kitchener footprint it’s prime real estate.
Toe-kick drawers turn that dead zone into hidden storage, usually three to four inches tall. They’re perfect for flat things that otherwise crowd your cupboards: baking sheets, cutting boards, serving trays, even pet bowls and a scoop of kibble. Because the drawers sit at floor level, nothing competes for counter or wall space, which matters in galley layouts and older homes where uppers are limited.
Add a low-profile LED strip along the toe-kick and the idea does double duty. A warm white strip (around 2700K) casts a soft pool of light across the floor, making the room feel taller and calmer. It also works as a gentle night light for midnight water runs, with no need to flip on the harsh overhead.
This approach suits basement-level and low-ceiling kitchens especially well. When you can’t go up, you go down, and the glow lifts the whole room visually. Plug-in strips with a dimmer keep it renter-friendly.
Image callout: warm glow along the kitchen floor line, with a toe-kick drawer partly open.
4. Open Shelving Paired with Picture Lights or Mini Spotlights
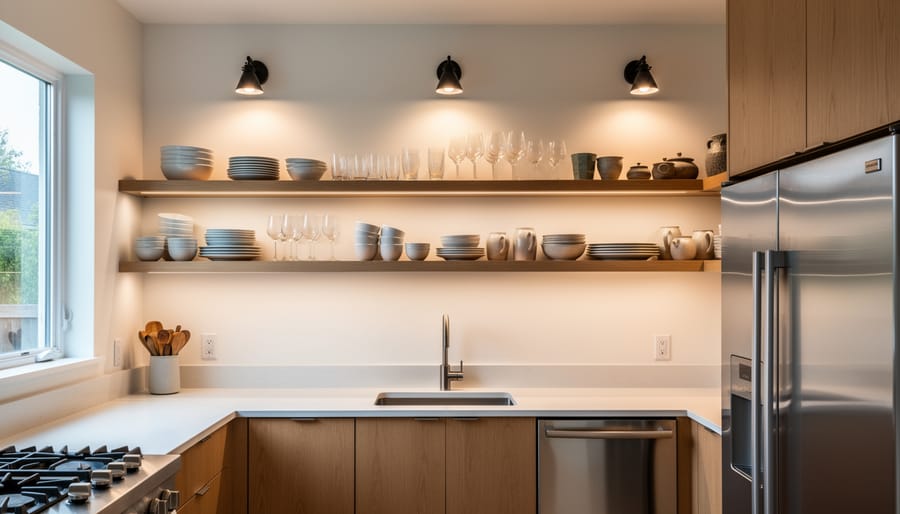
Swapping one upper cabinet for open shelving is one of the quickest ways to make a cramped Kitchener kitchen feel less boxed in. Without a door and a dark cabinet box, your eye travels straight to the wall behind, and light bounces around the room instead of getting swallowed. In a galley layout with a single small window, that extra bounce is noticeable by mid-afternoon in January.
Lighting is what turns plain shelves into a feature. A slim brass picture light, a clip-on mini spotlight, or a small plug-in LED bar aimed at the shelf makes everyday plates and glasses read like a little display. Keep the colour warm, around 2700K, so white dishware looks soft rather than clinical. Renters can lean on clip-ons and battery-powered options and skip the wiring entirely.
The catch is that open shelves show everything. Stick to one or two materials, such as white ceramics and a few wooden boards, and decant dry goods into matching jars or tins. Limit yourself to three or four groupings and leave some empty space on each shelf, since a bit of breathing room is what makes it look styled.
Place your hidden storage right below or beside the shelves, so the things you reach for daily can disappear behind doors while the pretty pieces stay on show.
Image callout: styled shelf with a brass picture light.
5. Rail Systems with Hooks and a Built-In Light Bar
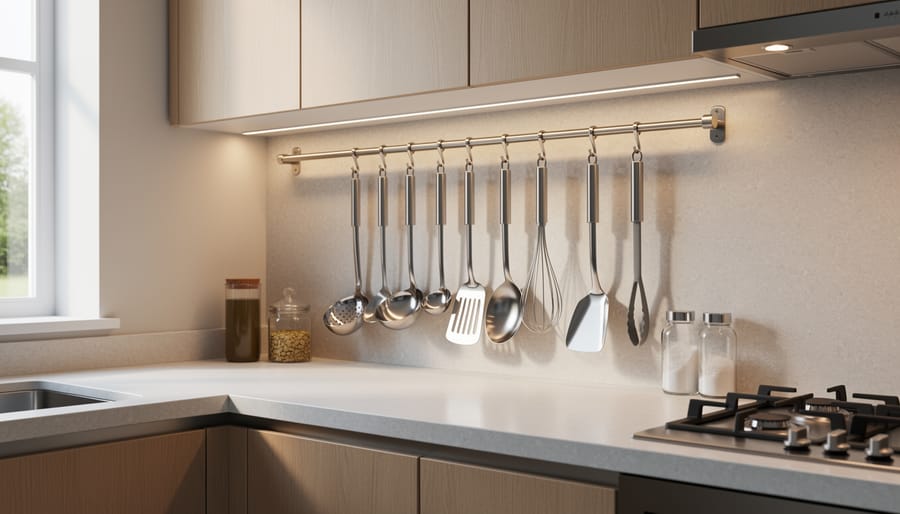
A wall-mounted rail is the simplest way to pull clutter off a narrow counter. A horizontal bar mounts along the backsplash, and S-hooks, small baskets, and a magnetic knife strip hang from it. Utensils, mugs, pots, and even a cutting board move to the wall, which can free up a surprising amount of counter space in a galley kitchen.
Lighting turns the rail into a working zone. Some systems come with a built-in light bar, while others let you mount a slim LED bar just above or beneath the rail. Either way, the bright strip washes the hanging items and the counter below, so you can spot the right whisk without digging. Choose a warm white of around 2700K to 3000K so brass pots and ceramic mugs look inviting rather than clinical.
This approach suits rentals and condos because it asks so little of the room. You need only a few small screw holes, or adhesive-backed options for light loads, and no cabinet changes at all. A plug-in or battery light bar means there’s no wiring to touch. If you move out, patch the holes and take the whole setup with you.
Keep weight in mind: anchor into studs or use proper wall anchors, and hang only what the rail is rated to carry.
Image callout: a rail-lined backsplash in a narrow kitchen, with utensils and mugs lit by a slim light bar.
6. Corner Carousels and Blind-Corner Pull-Outs with Interior Lighting
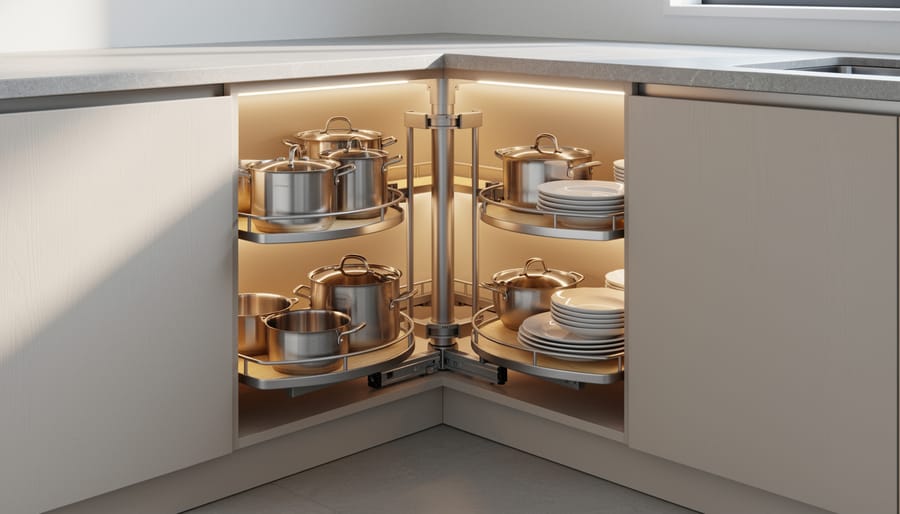
Blind corners are the classic L-shaped kitchen headache: a deep, dark cavity where pots go in and rarely come back out. The fix is a mechanism that brings the contents to you. Lazy Susans (rotating round or kidney-shaped shelves) spin items into reach. Swing-out trays pivot on an arm as you open the door. “Magic corner” units slide the front basket out while a second one glides into the open space behind it.
Lighting is what makes these zones genuinely usable. A battery-operated puck light stuck inside the cabinet frame works for renters, and many switch on with a door sensor or a quick tap. Owners can have an electrician hardwire a puck or a slim LED bar so the glow comes on every time the door opens. Warm white keeps colours true without glare.
Here’s the trade-off in plain terms. A simple lazy Susan costs the least but wastes some capacity in the corners of the square cabinet. A full magic-corner or swing-out system costs noticeably more yet uses nearly every inch and keeps heavy cookware reachable. Compact Kitchener kitchens usually reward the pricier option, since every inch counts.
Pair your bright, light-toned doors with a few oversized mirrors nearby, or simply clean your windows to let more light reach the room, so the corner stops feeling like a cave.
[Image callout: a pull-out corner unit in action, with the lit basket sliding fully into view]
7. Slim Pendants or Flush Mounts Over a Mini Island or Peninsula
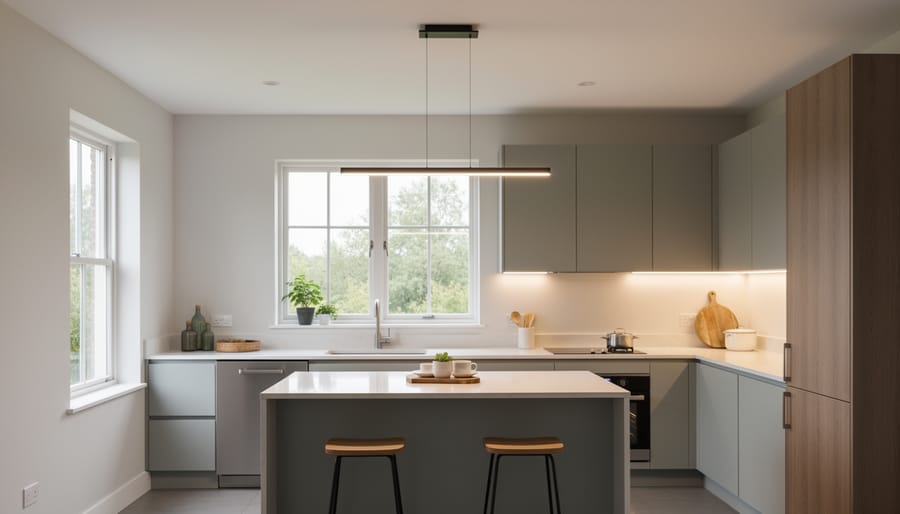
In a tight Kitchener galley or L-shaped kitchen, a full island is usually out of the question. A narrow rolling cart, a drop-leaf peninsula, or a prep ledge just 12 to 16 inches deep gives you the same payoff on a smaller scale. Each one adds a place to chop, a spot for two stools, and a shelf or drawer below for baking sheets, cutting boards, or the small appliances you hate to store on the counter.
Then comes the light. Ambient lighting is simply the soft, general glow that fills a room so you can move around comfortably, separate from the focused task lighting over your work surface. In low-ceiling bungalows and older brick homes, a slim pendant or a low-profile flush mount does this job without crowding your head. Think of designers who study designer growth: they learn early that fixture scale matters as much as style.
Keep the fixture small and proportional. A pendant roughly one third to one half the width of the surface looks balanced, and clear or seeded glass lets light pass through instead of blocking sightlines. Hang the bottom of the pendant about 30 to 36 inches above the counter, or go flush if your ceiling is under eight feet. Choose a dimmable warm bulb so the room can shift from bright prep mode to cozy evening.
Image callout: a compact peninsula under a glass pendant.
8. Glass-Front Cabinets and Mirrored Backsplashes to Stretch Light
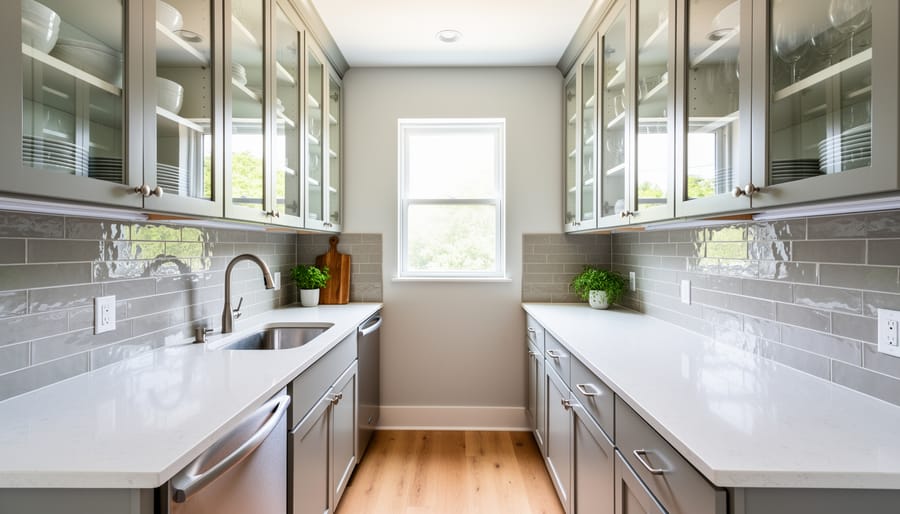
Kitchener winters can leave a small kitchen dim for months, especially if the window faces north or looks onto a neighbour’s wall. Swapping two or three solid upper doors for glass fronts lets you light the inside of the cabinet and turn it into a soft glowing feature. A single LED strip along the inner frame of each cabinet is plenty, and it adds ambient light without eating any floor or counter space.
Reflective surfaces do the rest of the work. A glossy white or pale ceramic tile, a mirrored panel, or even a slim strip of antique mirror beside the range bounces that glow and any daylight further across the room. In a galley layout, that extra depth can make the space feel wider than it is.
For finishes, consider reeded or seeded glass if you’d rather soften what’s inside, or clear glass for a crisp, modern look. Brass or matte black hardware gives a nice contrast against a light-toned backsplash.
Keep the contents calm. Stick to matching white dishes, a few glasses, and one or two accent pieces, and store the colourful odds and ends behind solid doors nearby. For more looks to compare, browse our design image library.
Image callout: a glowing glass cabinet beside a light-toned backsplash.
Quick Answers for Planning Your Compact Kitchener Kitchen
Is plug-in lighting enough if I rent?
Yes. Plug-in under-cabinet LED strips and bars give you shadow-free counters without touching the wiring, and most mount with removable clips or adhesive, so they travel with you when you move.
How many lighting layers does a tiny kitchen need?
Two is a solid start: ambient light overhead, like a slim flush mount, plus task light under the cabinets. Add a third accent layer, such as picture lights over open shelves, if you have room for it.
Which colour temperature feels best in winter?
Warm white, around 2700K to 3000K, keeps the room cozy during long grey Kitchener months. Pick a dimmable option so you can brighten things up for chopping and soften them for dinner.
When should I call an electrician?
Call one for anything hardwired, like new pendants, in-cabinet wiring, or added circuits. Plug-in and battery fixtures are usually safe DIY, but confirm permit rules with the City of Kitchener or the Electrical Safety Authority first.
Budget varies widely, so start with the cheapest high-impact swap, like under-cabinet strips, and save pull-outs and hardwired fixtures for a later phase. If you can only change one thing, light your counters first. Better light makes every inch of a small kitchen feel bigger.
Did planning these layouts feel more like fun than work? That instinct is worth building on. If you dream of turning your eye for space, storage, and lighting into an interior design career, explore the professional growth resources for designers here at Decor SDA.
A small Kitchener kitchen feels bigger when storage goes vertical and light goes layered. Whether you start with under-cabinet LED strips to chase shadows off the counter or a slim pull-out pantry tower beside the fridge, one good change can make the whole room work harder. Pick one or two ideas from this list that match your layout and your comfort with a screwdriver or a call to the electrician, then try them before planning anything bigger. When you’re ready for more inspiration, browse Decor SDA’s image library and picture your own galley or L-shaped kitchen glowing, organized, and roomier than its footprint suggests.